
How to Do French Manicure at Home
Meta description:
How to do a French manicure at home step by step—even as a beginner. Pro Prep, Hacks, and Variations for a Natural-Looking, Long-Lasting French.
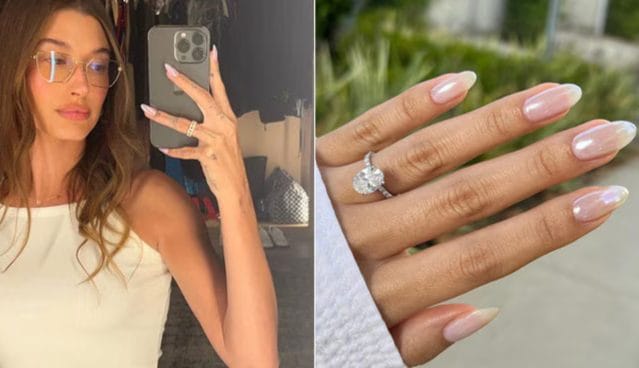
You already know a clean French manicure reads expensive on camera. It works with every outfit, every season, every brand collaboration. But sitting in a salon twice a month isn’t always realistic—especially when you’re batch-creating content.
If you’ve been Googling how to do a French manicure at home and bouncing between 10 tabs, this guide is your one-stop, creator-tested playbook. I’ll walk you through a realistic at-home French manicure tutorial, plus the pro tricks I use when I’m getting hands ready for close-up content—Reels, GRWMs, product shots, and campaigns.
Why This At-Home French Manicure Guide Is Different
Most tutorials show the what—base coat, white tip, top coat—but skip the why and the what if. As a content creator, you need more than a basic “paint this, then that.” You need repeatable, on-brand results that withstand the rigors of filming days.
Here’s how this guide fills the gaps the top search results miss—using my own studio and client experience:
- Tailored advice by nail type & lifestyle
I’ll walk through how to tweak your DIY French manicure for very short/bitten nails, wide nail beds, ridged or brittle nails, and for people who are hard on their hands (think: constant typing, moms, hospitality, healthcare). - Clear troubleshooting & “fix it fast” tips
There’s a full section on smudges, wobbly smile lines, streaky base colors, bubbles, and shrinking polish—plus how to salvage a mani 10 minutes before you hit “record.” - Minimalist vs pro-level kits
You’ll see exactly what you must have to start—and what’s worth upgrading if you regularly film nail content or client tutorials, with rough budget/time expectations for each. - Longevity and nail health
Rather than just stacking more products, we’ll talk about application technique, re-sealing tips, and safe removal, based on dermatology-backed nail care advice. Fingernails typically take 3–6 months to fully grow out, so protecting them matters [American Academy of Dermatology, 2020]. - Modern customization ideas
From micro-French and colored tips to ombré and chrome, you’ll get creator-friendly variations and how the technique changes for each. - Left-hand & shaky-hand solutions
I’ll share positioning, tools, and tricks I use when filming on my own hands (and teaching beginners in workshops) so both hands look content-ready.
Takeaway: This is a practical, creator-focused blueprint—not just a generic at-home French manicure tutorial.
Suggested external link: Trend overview from a style authority like Vogue
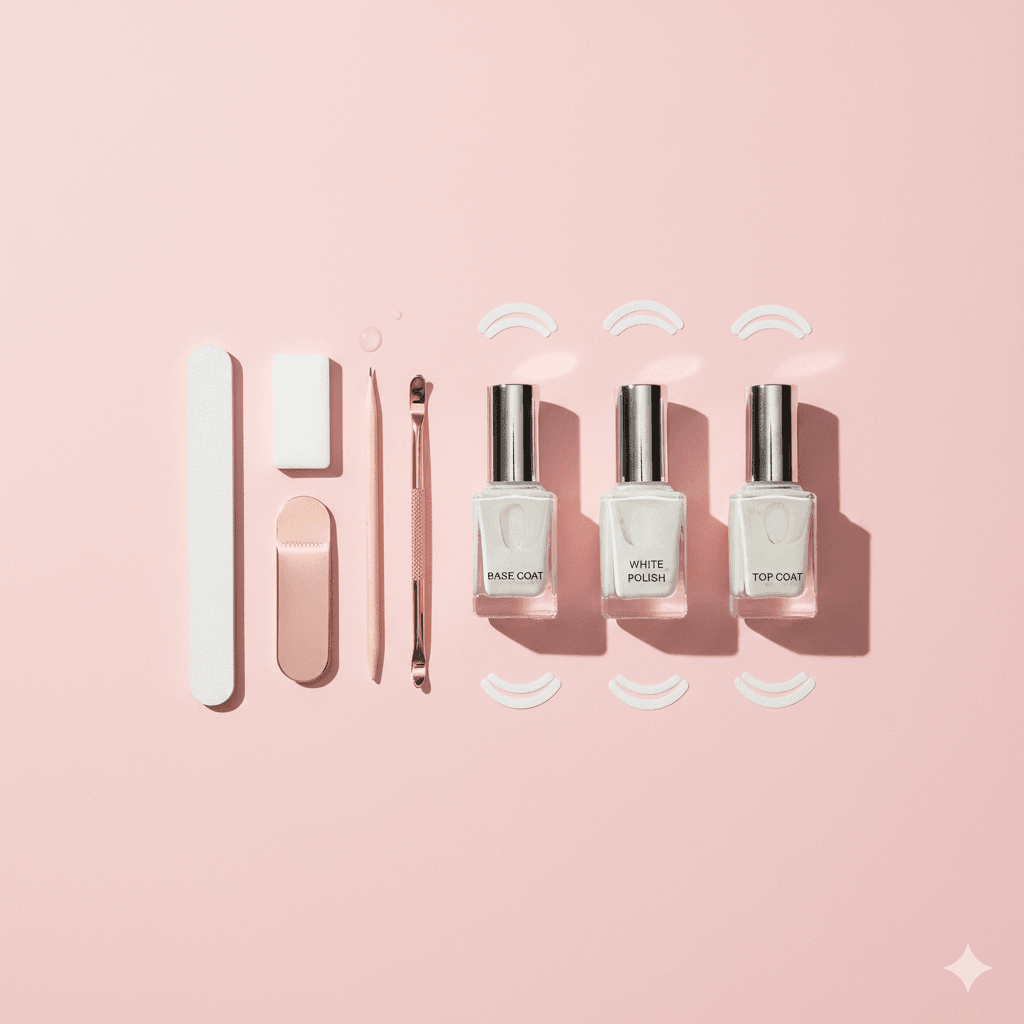
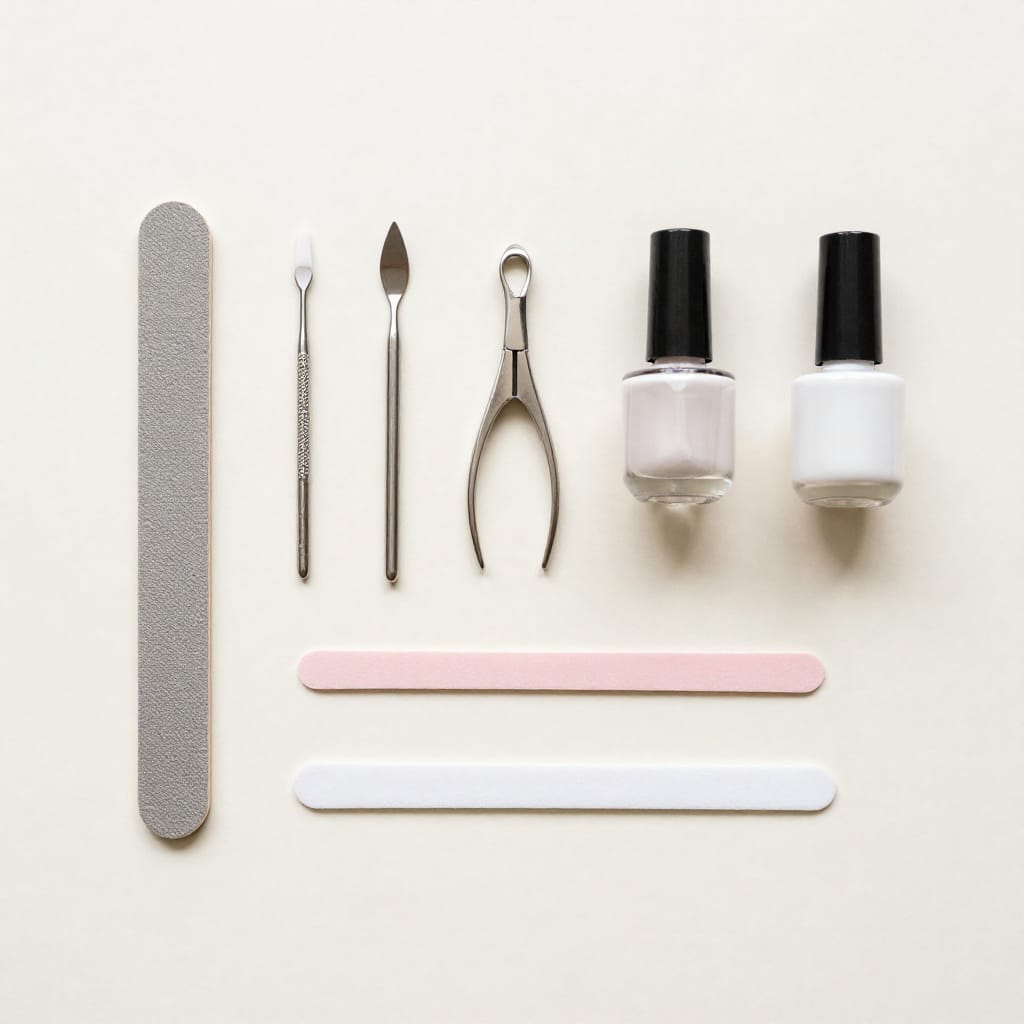
Tools You Actually Need: Minimalist vs Pro DIY Kit

You don’t need a salon drawer to learn how to do a French manicure at home—but certain tools dramatically cut your learning curve and filming time.
Minimalist starter kit (under ~€30–40 / $30–40)
If you want an easy French manicure for beginners, start here:
- Nail file (180/240 grit) – for shaping.
- Buffer block – to smooth the surface lightly.
- Cuticle pusher – metal or orangewood.
- Non-acetone polish remover + lint-free pads – cleaner surface, fewer fibres.
- Base coat – strengthening or ridge-filling if your nails are uneven.
- Sheer nude or pink polish – your “natural nail” shade.
- Opaque white polish – for the tips.
- Glossy top coat – quick-dry if you’re impatient.
- Small angled brush + remover – for clean-up around the edges.
With just these, you can get a clean, natural-looking French manicure on camera.
Pro-level upgrades (for regular creators or perfectionists)
Once you’re posting nail content regularly or doing others’ nails, these upgrades are worth it:
- Striping/detail brush – ultra-thin brush for precise smile lines.
- Dotting tool – to map the curve of the tip before filling it in.
- Nail tip guides or stickers – training wheels for beginners.
- Dehydrator and acid-free primer – improve adhesion, especially for oily nails.
- Gel polish + LED/UV lamp – for 2+ weeks of wear and stacked filming days.
- Cleanup pen – faster than a brush + remover when working on yourself.
- Cuticle oil – for hydration and that final “editorial” sheen in close-ups.
Time expectations
For a classic Polish French:
- Beginner, minimalist kit: 45–60 minutes (including careful drying).
- More practiced, with tools: 30–40 minutes.
- Gel French (with lamp): 45 minutes, but you can use your hands immediately after curing.
Takeaway: Start with the minimalist kit; add pro tools only when your content and workload justify the upgrade.
Suggested external link: Basic nail tool overview from the Cleveland Clinic
Prep Like a Pro: Nail Health, Shape & Cuticles
Good prep is 70% of a successful French. The whiter the tip and the sheerer the base, the more any ridge, dry cuticle, or stain will show.
Step 1: Clean, remove, and dehydrate
- Remove old polish completely with a non-acetone remover.
- Wash your hands with soap and water, then dry them thoroughly.
- Wipe each nail with remover again to remove oils—this helps adhesion.
Dermatologists emphasize avoiding overuse of pure acetone because it dries the nail plate and surrounding skin [American Academy of Dermatology, n.d.]. Save it for stubborn glitter or gel removal only.
Step 2: Shape your nails (by content goals)
- Square or squoval – classic French, great for close-up product shots.
- Soft almond – elongates fingers; ideal if you have shorter nail beds and want elegant selfies.
- Short, rounded – practical if you type a lot or work with your hands.
File in one direction from side to center; sawing back and forth can cause splitting.
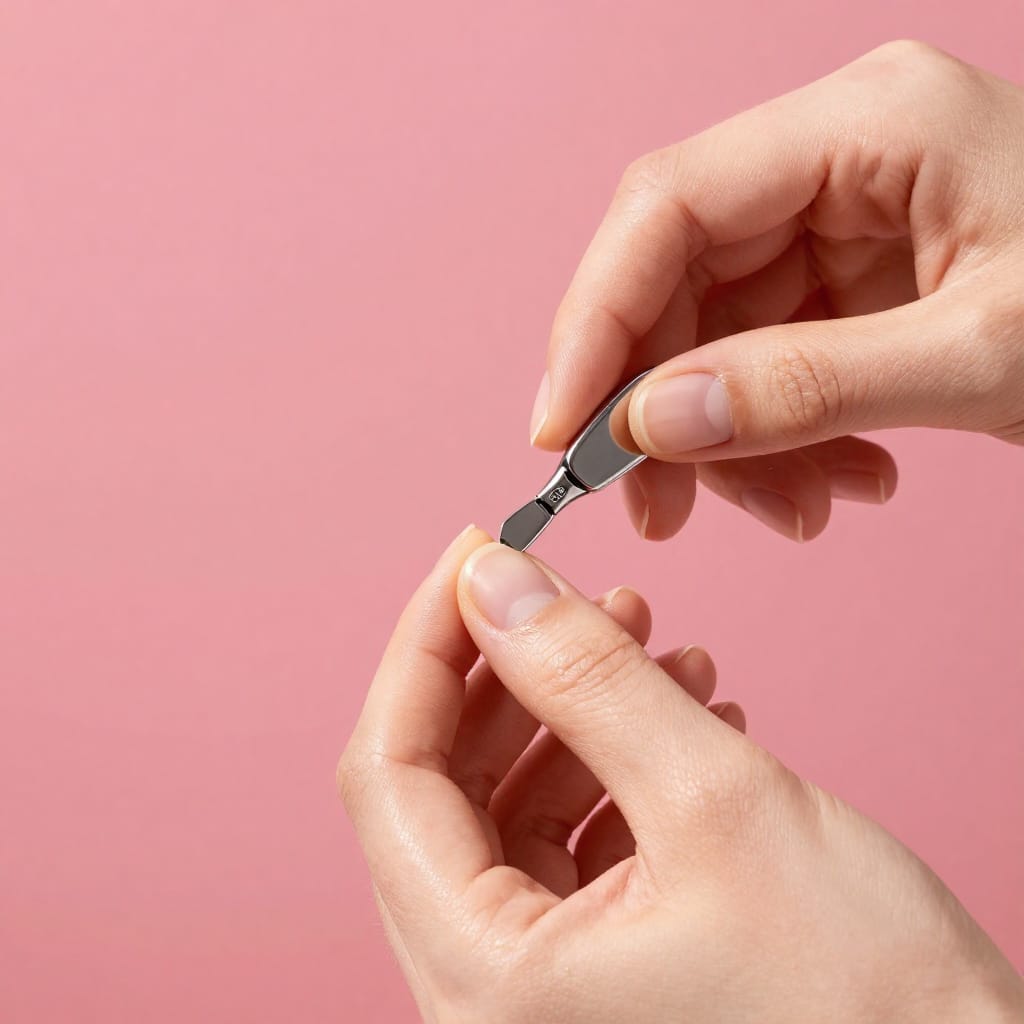
Step 3: Cuticles, but safely
- Soften cuticles with warm water or a cuticle remover.
- Gently push them back with a pusher; do not aggressively scrape.
- If you must trim, only remove hangnails or obvious loose skin.
According to the American Academy of Dermatology, over-trimming cuticles can lead to infection and nail damage [AAD, n.d.]. Clean, not cut to oblivion, is the goal.
Step 4: Lightly buff (especially for ridges)
- Use a fine buffer to gently smooth the nail plate.
- Focus on ridged nails so your sheer base looks even.
- Don’t over-buff; once or twice a month is enough.
Takeaway: Thoughtful prep gives you a smoother canvas, better adhesion, and a French manicure that looks more “editorial shot” than “first try at home.”
Suggested external link: Nail care basics from the American Academy of Dermatology
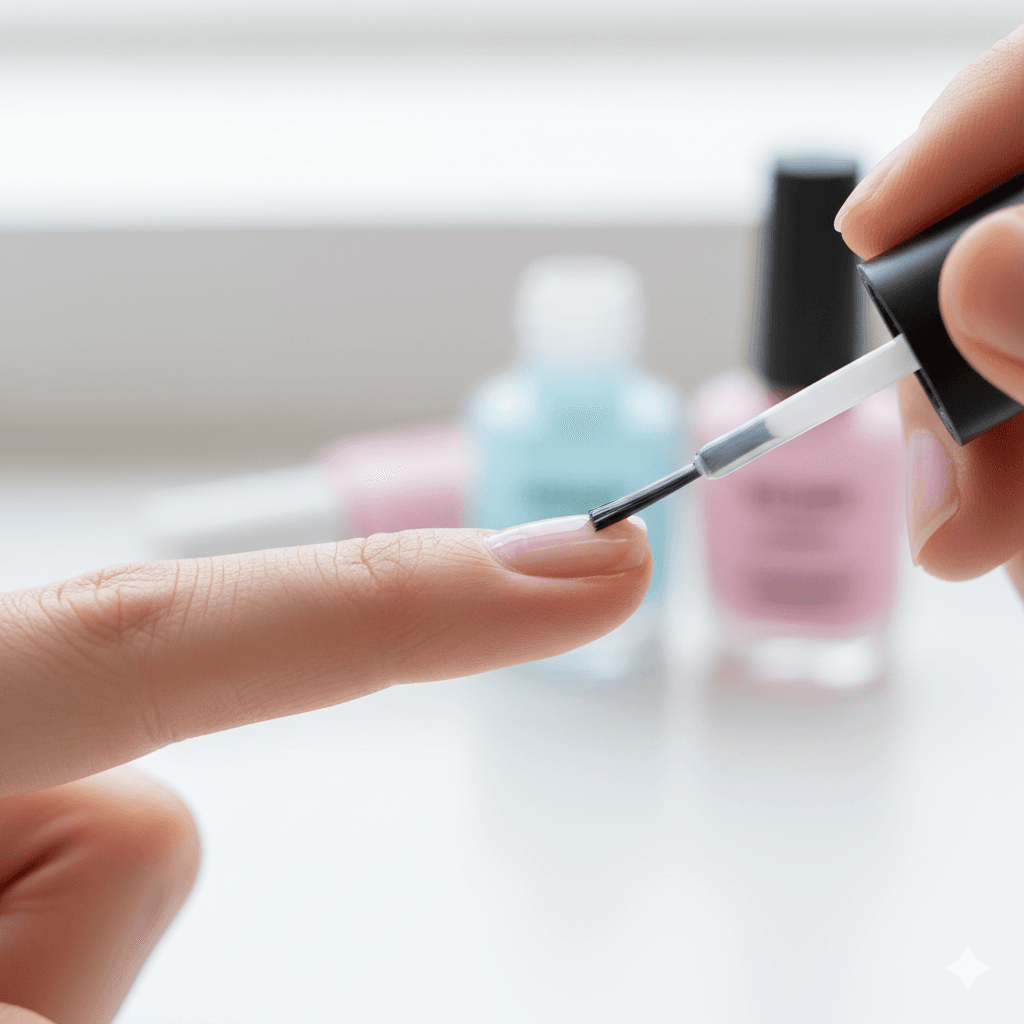
French Manicure Step by Step: Classic At-Home Tutorial

Now to the main event: a French manicure step by step that’s realistic for home, yet polished enough for high-res content. This is the exact flow I use when prepping hands for campaigns.
Step 1: Base coat
- Apply a thin layer of base coat on each nail.
- Cap the free edge (drag the brush horizontally across the tip).
- Let it dry for 1–2 minutes.
Capping the edge is crucial for a long-lasting French manicure at home, especially if you have soft or peeling nails.
Step 2: Sheer nude or pink base
- Apply 1 thin coat of your nude/pink “natural nail” shade.
- If you want more coverage (for stains or uneven color), add a second thin coat.
- Allow proper dry time between coats to avoid bubbles and shrinking.
For a more natural-looking French manicure, match your base to the undertone of your nail beds—not your skin tone. Cool undertones? Soft pink. Warm? Beige-pink or peach.
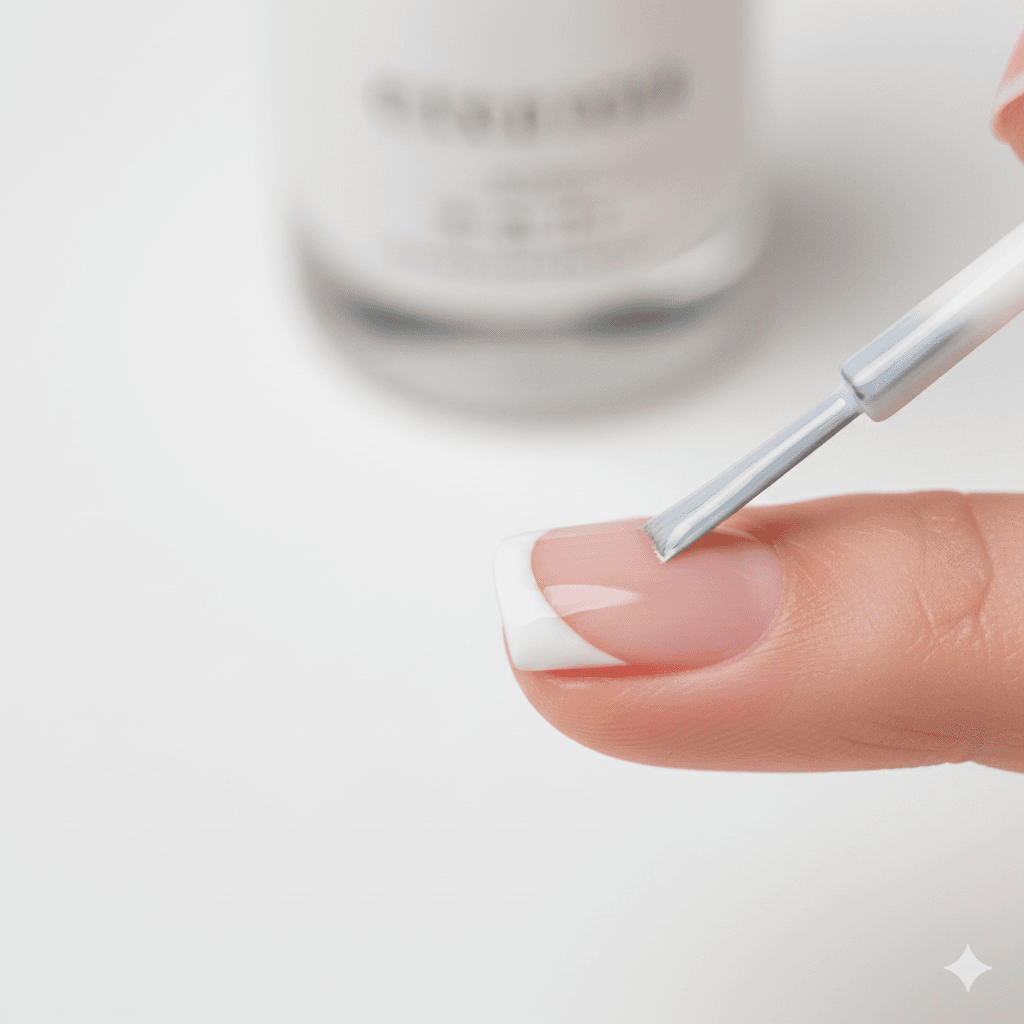
Step 3: White tips (two easy methods)
Method A: Freehand (for more control)
- Hold the brush horizontally, loaded but not dripping.
- Instead of moving the brush, slowly roll your fingertip underneath it to create the curve.
- Start with a thin line; you can thicken it on a second pass.
Method B: Tip guides or stickers (for beginners)
- Apply guides where you want the smile line.
- Press edges firmly to prevent bleeding.
- Paint the exposed tip white, and remove the guides carefully before it fully dries.
Aim for tips that are roughly:
- ⅕ of the nail length on short nails.
- ¼ of the nail length on longer nails.
Step 4: Clean-up and perfecting
- Use a small, angled brush dipped in remover to sharpen smile lines.
- Wipe the brush on a pad after each stroke to avoid smearing.
- Check your nails at arm’s length and in your filming lighting; tiny imperfections disappear on camera faster than you think.
Step 5: Top coat
- Apply a generous but controlled layer of top coat over the entire nail.
- Again, cap the free edge.
- Let nails dry fully—20 to 30 minutes for classic polish—before heavy use.
Takeaway: Following this structured, at-home French manicure tutorial gives you a clean, camera-ready French that still looks like your hands—not plastic press-ons.
Suggested external link: Step-by-step polish tips from OPI
Tailoring Your French to Nail Type, Shape & Lifestyle

Not all nails are created equal. Adapting your French to your nail type makes the difference between “nice in theory” and “this actually works for my life.”
If you have short or bitten nails
- Keep the tip super thin. A micro-French (1–2 mm) elongates the nail without making it look stubby.
- Use a sheer beige instead of pink. It visually extends the nail bed.
- Round or squoval shape works best; harsh square edges can emphasize shortness.
For chronic nail biters (up to 20–30% of the population, depending on the study [Pacan et al., 2014]), micro-French is the most forgiving option.
If your nails are wide or flat
- Curve the white tip slightly higher at the sides to create the illusion of a narrower nail.
- Avoid very thick tips; they can make nails look wider on camera.
- Choose a cool-toned pink base to add dimension.
If your nails are ridged or brittle
- Always use a ridge-filling base coat.
- Opt for gel or hybrid polishes—they’re more flexible and chip-resistant.
- Keep your nail length moderate; long, brittle nails snap under daily typing and content equipment handling.
If you’re hard on your hands (healthcare, hospitality, parents)
- Choose a short to medium squoval for strength.
- Use a rubberized base or builder-in-a-bottle for extra reinforcement (with gel lamp).
- Reapply top coat every 3–4 days to re-seal the white tips.
Takeaway: A French manicure looks best when it respects your natural nail shape and your real lifestyle, not just an ideal Pinterest hand.
Suggested external link: Nail shape advice from Allure
Beginner-Friendly Hacks for Shaky Hands & Non-Dominant Hands
Painting your dominant hand is one thing; painting your content-facing hand with your non-dominant hand is another game entirely.
Here are the French manicure tips and tricks I use when teaching beginners:
Positioning and stability
- Plant your elbows on a table for stability.
- Bring your hands closer to your chest—you naturally have more control.
- Hold the polish brush like a pencil, not a paintbrush.
For your non-dominant hand, flip the mindset: move the finger under a mostly-still brush, rather than moving the brush around the finger.
The “eraser” method for tips
If freehanding scares you:
- Paint a slightly messy white tip across the end of the nail.
- Take a flat brush dipped in remover.
- “Erase” upwards into the white to shape your smile line.
This is softer and more forgiving than trying to draw a perfect arc right away.
Use tools as training wheels
- Tip guides for your first few manis.
- Dotting tool: Place 3 dots (left, center, right) where you want the smile line, then connect them.
- Thin liner brush: more precision than the thick bottle brush.
My creator anecdote: fixing a shaky-hand disaster
I once shot a sponsored reel for a jewelry brand where the model cancelled last minute, so I used my own hands. With 40 minutes to set up, I rushed a French, and my non-dominant hand looked like it had been painted in a moving car.
Rescue plan:
- I used the eraser method with a flat brush and remover to sharpen the worst tips.
- Swapped to a micro-French, making the tips thinner to disguise wobble.
- Filmed at a slightly higher angle with softer lighting, imperfections vanished on camera.
The campaign still performed, and no one noticed the panic in French.
Takeaway: Smart positioning, tools, and edit-friendly tricks matter far more than having “perfectly steady hands.”
Suggested external link: Hand stability and fine motor tips from Mayo Clinic
Long-Lasting French Manicure at Home: Wear-Time Secrets

A beautiful French that chips in 24 hours is a waste of your time—and your content pipeline. Let’s turn this into a long-lasting French manicure at home.
Application habits that extend wear
- Thin coats only. Thick layers peel faster and take forever to dry.
- Cap the edges with every layer (base, color, top).
- Avoid getting polish on the cuticles—once it lifts there, the whole polish can peel.
Nails grow about 3.5 mm per month [American Academy of Dermatology, 2020], which means a 7–10 day wear is realistic for regular polish before growth at the base becomes obvious.
Weekly maintenance routine
To stretch your mani beyond filming day:
- Day 2–3:
- Gently file any tiny chips at the very edge.
- Apply a fresh layer of top coat, again capping the tips.
- Daily or every other day:
- Massage cuticle oil into nails and surrounding skin.
- Follow with hand cream, especially at night.
Keeping nails and cuticles moisturized reduces micro-cracks that lead to chipping and breakage.
Protection in daily life
- Wear gloves for dishes and harsh cleaning products.
- Avoid using your nails as tools (opening cans, scraping labels).
- If you’re constantly on a keyboard, keep your nails moderate; long nails flex and cause stress cracks.
Takeaway: Longevity isn’t about piling on products; it’s about thin, well-sealed layers and small daily habits that protect your work.
Suggested external link: Hand and nail health tips from DermNet NZ
Modern French Manicure Variations Your Audience Will Love

Once you master the classic, it’s time to create looks your audience will save, share, and screenshot. A DIY French manicure is the perfect base for trend-led twists.
On-trend variations
- Micro-French: Ultra-thin white or colored line at the edge; office-friendly but fashion-forward.
- Colored French: Swap white for neon, pastels, or brand colors—great for campaigns.
- Chrome or metallic tips: Use a chrome powder over a colored tip for a futuristic feel.
- Ombré/Baby-boomer French: Gradient from pink to white using a sponge.
- Reverse French: Color at the cuticle line instead of the tip.
For each, the technique stays similar—you’re just changing color placement and occasionally tools (like sponges for ombré).
Content-creation strategy
- Film your classic French as a base tutorial.
- Batch-create variations on top of that base:
- Day 1: Classic.
- Day 3: Add a thin gold chrome line over the white.
- Day 5: Paint a colored stripe over the white for a double-French.
You’ve just pulled 3–4 pieces of content from one manicure.
Brandable French ideas
- Match tip color to a brand’s HEX code for sponsored posts.
- Create seasonal series: “12 Days of Holiday French,” “Spring Pastel French Week.”
- Use micro-French with negative space nail art (tiny hearts, dots, graphic lines).
Takeaway: Once your technique is solid, French becomes a flexible canvas for endless, on-brand nail content.
Suggested external link: Trend coverage from Harper’s Bazaar
Troubleshooting: Quick Fixes for Common French Mistakes
Even pros mess up—what matters is how fast you can fix it, especially before a shoot.
Problem 1: Wobbly or uneven smile lines
Fix it fast:
- Dip a small flat or angled brush in remover.
- Wipe off excess so it’s damp, not dripping.
- Gently “push” into the white to refine the curve.
If a nail still looks off, turn it into a micro-French by thinning out the tip. On camera, viewers rarely notice that one nail has a slimmer white edge.
Problem 2: Streaky base color
- Switch to a sheer, self-levelling polish—opaque cremes show streaks more.
- Use 3 ultra-thin coats instead of 2 thick ones.
- If it’s really bad, lightly buff once it’s fully dry and add a final sheer coat.
Problem 3: Bubbles in Polish
- Bubbles often come from shaking the bottle; instead, roll it between your palms.
- Apply thinner coats and allow enough drying time.
- If bubbles appear, let the layer dry, lightly buff the surface, and reapply a thin coat.
Problem 4: Smudging just before filming
If one tip smears minutes before you hit record:
- Don’t wipe; let it dry for a couple of minutes.
- Gently file any raised edges.
- Paint a slightly thicker French tip to cover the smudge.
- Re-topcoat the whole nail.
Worst-case scenario? Hide that finger in shots or crop tighter—art direction is part of the tool kit.
Problem 5: Polish shrinking at the edges
- This happens when the top coat doesn’t “play nice” with your color.
- Try floating a thicker bead of top coat over the nail without over-brushing.
- Always cap the edges, and avoid quick-dry sprays that can cause shrinkage.
Takeaway: A small brush, a bit of remover, and flexible expectations can rescue 90% of French manicure mishaps.
Suggested external link: Nail polish troubleshooting from Nails Magazine
Author, Fact-Check & References
Author box
Author: Smith Kevin
Headshot alt text: Portrait of Smith Kevin, beauty content creator and nail expert
Smith Kevin is a licensed nail technician, beauty content creator, and social media strategist with over a decade of experience producing nail, hair, and makeup content for brands and influencers across the US and Europe. His work has appeared in online beauty magazines and campaigns for fashion, lifestyle, and cosmetics labels.
Fact-check & review note
This article is based on Smith Kevin’s 10+ years of hands-on nail work, plus guidance from reputable dermatology and nail-care organizations. Product-agnostic best practices were cross-checked against resources from the American Academy of Dermatology, major medical centers, and established beauty publications. Where research is cited, it is referenced below.
Disclaimer
This guide is for informational and educational purposes only and does not replace personalized advice from a licensed medical professional or dermatologist. If you have nail disorders, infections, allergies, or chronic health conditions, consult a qualified professional before starting new nail-care routines or using new products.
Internal link suggestions
- “spring nail ideas” → /spring-nail-ideas
- “beginner nail art tutorial” → /beginner-nail-art-tutorial
- “How to care for natural nails” → /natural-nail-care-guide
REFERENCES (APA style)
American Academy of Dermatology. (2020). Nail care: Tips for healthy nails. Retrieved from https://www.aad.org
American Academy of Dermatology. (n.d.). Nail health and nail care. Retrieved from https://www.aad.org
Cleveland Clinic. (n.d.). Nail care: Do’s and don’ts. Retrieved from https://my.clevelandclinic.org
DermNet NZ. (n.d.). Nail disorders and nail care. Retrieved from https://dermnetnz.org
Harper’s Bazaar. (n.d.). Nail trends and manicure ideas. Retrieved from https://www.harpersbazaar.com
Mayo Clinic. (n.d.). Fine motor skills and hand health. Retrieved from https://www.mayoclinic.org
Nails Magazine. (n.d.). Polish application and troubleshooting. Retrieved from https://www.nailsmag.com
OPI. (n.d.). Nail polish application tips. Retrieved from https://www.opi.com
Pacan, P., et al. (2014). Onychophagia is a spectrum of obsessive-compulsive disorder. Journal of Obsessive-Compulsive and Related Disorders, 3(4), 282–288.
Vogue. (n.d.). Nail trends and French manicure revivals. Retrieved from https://www.vogue.com
FAQs (formatted for FAQ schema)
Q1. How can I do a French manicure at home as a complete beginner?
A: Start with clean, shaped nails, apply base coat, then a sheer nude or pink. Use tip guides for the white tips, clean up with a small brush and remover, then finish with top coat. Go slow, use thin layers, and let each coat dry fully.
Q2. What’s the easiest way to paint French tips with shaky hands?
A: Use the “eraser” method: paint a rough white band on the tip, then refine the smile line with a flat brush dipped in remover. Rest your elbows on a table, move the finger instead of the brush, and consider micro-French tips, which hide small wobbles.
Q3. How long should an at-home French manicure last?
A: With good prep, thin layers, and capped edges, regular polish French manicures typically last 5–7 days. Reapplying top coat every 3–4 days and wearing gloves for cleaning can stretch wear closer to 10 days, depending on how hard you are on your hands.
Q4. Can I do a French manicure on very short nails?
A: Yes. Keep the white tip extremely thin (1–2 mm) and choose a sheer beige or nude base to visually extend the nail bed. A rounded or squoval shape and micro-French style look elegant and are more flattering on short or bitten nails.
Q5. Is gel or regular polish better for a French manicure at home?
A: Gel offers longer wear (10–14 days) and instant “dry” time after curing, making it ideal for frequent content creation. Regular polish is more affordable, easier to remove, and safer for beginners. Choose based on your comfort level, budget, and how often you film.
TL;DR (for skimmers)
- Prep is everything: clean nails, gentle cuticle care, and light buffing make your French look professional.
- Use a minimalist kit to start; upgrade with striping brushes, guides, and gel as your content and skills grow.
- Follow a clear French manicure step by step: base coat, sheer nude/pink, white tips, clean-up, and top coat.
- Adapt the style to your nail type and lifestyle with micro-French, short squoval shapes, and reinforcing bases.
- For shaky hands, stabilize your elbows, move your finger under the brush, and use the “eraser” method.
- Make it last with thin coats, capped edges, daily cuticle oil, and reapplying top coat every few days.
- Experiment with modern twists—colored, chrome, and reverse French—for content your audience will share.

Kevin Smith is a talented beauty and nail designer based in New York, NY. Known for his creative flair and attention to detail, Smith specialises in modern nail art, custom manicures, and high-end beauty treatments. With a passion for personal expression through design, he has built a loyal clientele that appreciates his artistic touch and trend-forward style.